BUILD LAB / DEEP GUIDE
Pathogenic Organelle Combinations: 5 Practical Builds and Wiring Rules
A strong build is a repeatable cause-and-effect chain, not a pile of rare Organelles. This guide teaches you to read that chain, then gives five templates you can assemble during a real run. When a named part does not drop, replace its function rather than abandoning the build.
SECTION 01
How to prove a connection works
Adjacent does not automatically mean connected. Start at the attack or effect, follow the connection direction, and read the expanded text for the target. Treat a link as real only when the editor identifies a valid modifier, Infuser, chainable effect, or Overcharge receiver.
The current tutorial provides a clean example: connect Attractor to Galvanic Infuser so the Infuser's lightning arcs home toward enemies. That also proves an Infuser can modify another Infuser's output when the direction and effect type are valid.
- Concentrate limited connections on one or two reliable damage sources.
- Organelle cycles now apply at most once; do not plan around an infinite loop.
- Validate the link before comparing rarity or headline damage.
SECTION 02
Build 1: Homing arcs — the clearest chain
This shell starts with the tutorial's direct interaction. A frequently hitting weapon triggers Galvanic Infuser; Attractor makes the resulting arcs home; Recuperative Mitochondrion turns successful hits from a connected attack into Overcharge.
It is reliable in crowded rooms and while moving. Connect the Mitochondrion to the branch that actually lands frequent hits, not merely to an available corner slot.
Homing Arc Core
Trigger arcs with frequent hits, give those arcs homing, and turn connected hits into a repeatable energy cycle.
 Galvanic InfuserCreates an arc that can receive modifiers
 AttractorMakes the connected arc home
 Recuperative MitochondrionCharges from successful connected attacks
- Main attack → Galvanic Infuser
- Attractor → Galvanic Infuser
- Recuperative Mitochondrion → the highest-hit valid branch
- Crowded standard rooms
- Mobile fights with imperfect aim
- Builds that need a stable hit counter
Watch forArc chance and homing strength vary with rarity, Overcharge, and patches. If the editor does not show a valid connection, physical adjacency is not enough.
SECTION 03
Build 2: Ricochet and pierce corridor engine
Elastosome makes projectiles bounce and explicitly passes connected bonuses after each bounce. Perforin Infuser similarly passes connected bonuses after each pierce. Triosome creates extra attacks that can inherit modifiers.
Do not assume a fixed order is always best. Ricochet gains value in narrow rooms, pierce gains value against lined-up enemies, and homing or range may be better in open arenas. First confirm that the starting weapon produces a compatible projectile.
Corridor Ricochet Chain
Let one shot keep carrying downstream effects after a bounce, pierce, or duplicated attack.
 ElastosomePasses modifiers after every bounce
 Perforin InfuserPierces and modifies the post-pierce attack
 TriosomeCreates extra attacks that inherit modifiers
- Projectile weapon → Elastosome
- Put the effect you want repeated downstream of the bounce
- Add Perforin for enemy lines; add Triosome only when the firing space supports it
- Narrow Intestine-style rooms
- Enemy packs and lines
- Mitochondria triggered by hit count
Watch forMore projectiles do not guarantee more effective damage. If geometry or firing angles waste them, remove one replication layer and compare Last Room Damage.
SECTION 04
Build 3: Extended melee with banked Overcharge
Extensor increases projectile range, melee reach, and areas of effect. That makes it one of the most direct safety improvements for a melee shell. Recuperative Mitochondrion only counts successful attacks from connected Organelles, so a fast, reliable melee branch can double as its charger.
Vacuole stores Overcharge for later release. It does not create energy, so add it only after the Mitochondrion trigger is reliable.
Extended Melee Battery
Land safer melee hits, convert them into charge, and bank that charge for the dangerous phase of a fight.
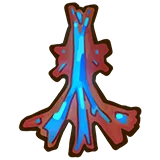 ExtensorAdds melee reach and effect rangeRecuperative MitochondrionCharges from connected successful attacks
 VacuoleStores and releases Overcharge on demand
- Melee weapon → Extensor
- Recuperative Mitochondrion → the most reliable melee attack
- Add Vacuole only after charge generation is consistent
- Players who like melee but need safer spacing
- Saving burst for an elite or boss phase
- Long single-target fights with repeatable hits
Watch forNever trade unavoidable damage for a hit counter. If Extensor still leaves you exposed, add movement, armor, freeze, or invulnerability before another damage multiplier.
SECTION 05
Build 4: Minion boss shell
Nidublast shoots a melee minion, Apex Nidus creates one heavy melee minion, and Swarm Nidus actively spawns a fast shooter. The current chain text says attacks from Nidublast and Apex Nidus minions can receive bonuses from connected modifiers.
Minions free your attention for telegraphs and movement, but they may chase the wrong target or touch hazards. A small number of strong, sustainable minions is usually safer for bosses; quantity has more room to work during standard clears.
Sustained Minion Core
Use Nidublast as the recurring source, Apex Nidus for single-target pressure, and Swarm Nidus only when the energy budget supports it.
 NidublastMain output: shoots melee minions
 Apex NidusCreates one heavy melee minion
 Swarm NidusActive fast-shooting minion
- Give Nidublast a valid attack modifier first
- Connect Apex Nidus to single-target damage or control
- Activate Swarm Nidus frequently only with sustainable charge
- Long bosses where dodging matters
- Lower continuous aiming load
- Shells with freeze, shields, or invulnerability
Watch forMinions are not extra armor. Bring independent survival tools, especially in the Brain, and watch for minions interacting with floor hazards.
SECTION 06
Build 5: Pickup-to-upgrade economy engine
Metabolic Mitochondrion provides Overcharge after a pickup. Refiner upgrades a random Organelle after accumulating enough Overcharge time, while Opulentor creates cores after meeting its Overcharge condition. Together they point toward pickup → energy → upgrades or resources → more pickups.
This is a growth engine, not an opening damage solution. Commit multiple slots only after your current output can clear safely. Official patches have changed Metabolic Mitochondrion's base charge duration, so old infinite-loop clips are inspiration, not a present-day guarantee.
Metabolic Growth Engine
Convert pickups into charge, then spend that charge on random rarity upgrades and more resource cores.
 Metabolic MitochondrionProvides Overcharge after a pickup
 RefinerUpgrades a random Organelle after sustained charge
 OpulentorCreates resource cores from Overcharge
- Metabolic Mitochondrion → Refiner or Opulentor
- Power one growth target first instead of splitting weak charge
- Add the second consumer only after output is stable
- Mid-run builds with a reliable weapon already online
- Amoeba shells that grow their slot budget
- Turning safe standard rooms into long-term value
Watch forEvery economy slot replaces damage or defense. If two or three rooms become meaningfully slower, remove the lowest-yield part.
SECTION 07
Replace missing parts and test the result
A roguelike will not hand you every recipe. Replace by role: output, hit correction, Overcharge source, Overcharge consumer, survival, and movement. A substitute is valid when it fills the missing role and the editor confirms the connection direction.
Change one placement at a time. Compare clear time, required risk, Overcharge uptime, and Last Room Damage. A higher number with much worse movement is not automatically a better build. Against bosses, repeatable single-target damage and repeatable energy are usually more dependable than on-kill triggers.
- Strong in rooms, weak on bosses: check for overreliance on kills or pickups.
- Great tooltip, poor contact: fix trajectory, reach, and firing angle first.
- Charge indicator stays active but damage does not rise: trace where that charge is actually delivered.
- More complex but slower: return to the last layout that passed your room test.
FAQ
Frequently asked questions
Is there one best combination for every Pathogen?
No. Shape, Plasmid tree, drops, rarity, and the current patch all matter. Copy the functional structure, then substitute parts that fit your actual connections.
Do multiple Mitochondria automatically double damage?
No. They may add charge or uptime, but the result depends on valid links, trigger conditions, Overcharge strength, and the receiving effect.
Why do adjacent Organelles sometimes do nothing?
Adjacency is not sufficient. Check the arrow, whether the target is infusable or chargeable, and whether the expanded description names the connected bonus.
How do I know whether a community build still works?
Check its date and official patch notes, then test the current tooltip, connection highlight, and Last Room Damage one variable at a time. Treat the video as an idea, not a numeric promise.
REFERENCES
Sources
The editorial team checks official patches and current game material first. Dated community discussions and footage support only the observations they document; unconfirmed claims are not presented as fixed rules.
- Pathogenic announcements and patch notesAberrant Labs / Slug Disco · 2026-07-25
Primary official source for chain-cycle changes, Mitochondria, minions, electric Organelles, and current balance context.
- Pathogenic on SteamAberrant Labs / Slug Disco · 2026-07-25
Official overview used with current in-game tooltips to cross-check names and core connection concepts.
- What internals or combos should I keep an eye out for?r/Pathogenic community · 2026-07-25
English community discussion of focusing one or two weapons, triangular links, and electric combinations.
- Pathogenic Overcharge GuidePathogenic Game Wiki · 2026-07-25
Cross-check for Overcharge stacking, additive and multiplicative notation, and controlled testing.
- Lazers + attractor + burnr/Pathogenic community · 2026-07-25
English field report on high-frequency hits, attraction, and damage-over-time; used as a concept rather than a fixed recipe.
- Pathogenic 用語・TIPS・隠し要素ガイドSteam Community · 2026-07-25
Japanese community reference used to compare terminology, build advice, and patch-sensitive interpretation.
- Pathogenic Wiki — Guías y organellesSpanish-language community · 2026-07-25
Spanish reference hub used to compare beginner build framing and terminology.